How to Build a Wood Fence: The Short Answer
To build a wood fence, verify your property lines and local codes first, call 811 to have buried utilities marked, then mark the fence line with stakes and string. Set posts no more than 8 feet apart in holes roughly 2.5 to 3 feet deep, add gravel and concrete for drainage and stability, attach rails and pickets, then seal the wood. A well-built wooden fence lasts 20 to 40 years with maintenance.
This guide is for homeowners weighing a diy fence against hiring help. Here's the part most people skip: a fence usually fails because of the boring stuff, not the carpentry. Wrong location, shallow posts, poor drainage, or ground-contact wood that wasn't rated for it will sink a project long before a crooked picket does. Think of the work in four phases: planning, setting fence posts, carpentry, and maintenance. Get the first two right and the rest is straightforward.
Those same considerations durability, installation quality, drainage, and the balance between protection and appearance are now shaping the broader fencing industry. According to Coherent Market Insights, the Fencing Market is estimated to be valued at USD 37.05 billion in 2026 and is projected to reach USD 56.45 billion by 2033, growing at a CAGR of 6.2% during the period. The market's expansion reflects several practical shifts visible in today's fencing projects. Durability is becoming a bigger priority, with homeowners paying closer attention to wood species, ground-contact ratings, protective finishes, and long-term maintenance. Drainage and installation practices are also receiving greater attention, as proper post depth, gravel bases, concrete placement, and water management can determine how long a fence lasts. At the same time, fencing is increasingly expected to balance security with residential aesthetics, particularly as homeowners look for privacy, attractive finishes, and reliable gates without compromising property protection.
Before You Dig Holes: Permits, Property Lines, Neighbors, and 811
The first step is confirming exactly where your property line runs. Home Depot's fence guidance recommends determining property lines and reviewing plans with neighbors who share the fence line, because a boundary mistake can force you to move the whole thing. If you're unsure, a survey is cheaper than a dispute. Talk to the neighbor early, especially if the fence sits on a shared line and cuts across the edge of each yard.
Check local ordinances next. The model IRC commonly exempts fences not over 7 feet from a building permit, but zoning can still cap height, and your local climate may push you toward sturdier construction as well. Seattle, for instance, says many fences 8 feet or less don't need a construction permit, while neighborhood zoning may still limit height. Portland requires permits for wood fences over 7 feet and for fences enclosing a pool. Fences over 6 feet are the ones most likely to trigger a permit, so read your city's page before buying lumber. If you're in an HOA, get its style and height requirements in writing.
Then call or click 811. It's a free national service that gets buried utilities marked before you dig, and it exists for a reason: excavation damage to underground lines is tied to roughly $30 billion a year in U.S. costs, and not contacting 811 is the leading cause of that damage. Every project counts, even shallow holes, since some lines sit only inches down. Marks in your yard tell you where you can and can't dig a post hole. Once you're cleared, run stakes and string to mark the fence line and post spots.
If a pool is anywhere in the plan, treat it as a separate safety category. The CDC recommends four-sided fencing at least 4 feet high with self-closing, self-latching gates, and reports that four-sided isolation fencing cuts a child's drowning risk by 83% compared with three-sided property-line fencing.
Choosing the Right Wood, Fence Posts, and Fasteners
Cedar is the most popular choice for its look and natural decay resistance. Redwood is durable and insect-resistant but costs more and isn't available everywhere. Pressure treated pine is the budget-friendly option and holds up well in ground contact, which is why so many fences mix treated posts with cedar pickets. For a wood privacy fence, cedar pickets over pressure treated posts is a proven pairing that balances looks and longevity, and it's a fence design that suits most yards.
Match the fencing materials to how they're used. AWPA guidance says treated-wood end tags should show the AWPA U1 standard and use category, and that ground-contact applications need UC4A or higher. Sawn fence posts fall under those UC4A ground-contact examples, while fence pickets sit in the above-ground UC3B category. In plain terms: your 4x4 posts need to be rated for burial, and the pickets don't. Don't swap them.
In wet regions, some builders hide steel or metal posts behind wood slats so the structural post never rots at grade. It's a common approach in the soggy Pacific Northwest, where companies like Inline Security Fence work with cedar fencing and drainage-heavy conditions that punish untreated wood. Metal posts also resist warping and won't crack the way a wood post can after years of freeze and thaw. Whatever you choose, use galvanized or stainless deck screws or nails so the fasteners don't rust and bleed streaks down the boards. Stainless screws cost more but stay clean the longest, while hot-dipped galvanized nails are a reliable middle ground.
One safety note: wear goggles and a dust mask when cutting treated lumber, and never burn preservative-treated wood in a residential setting. Older CCA-treated wood in particular calls for that caution per EPA guidance.
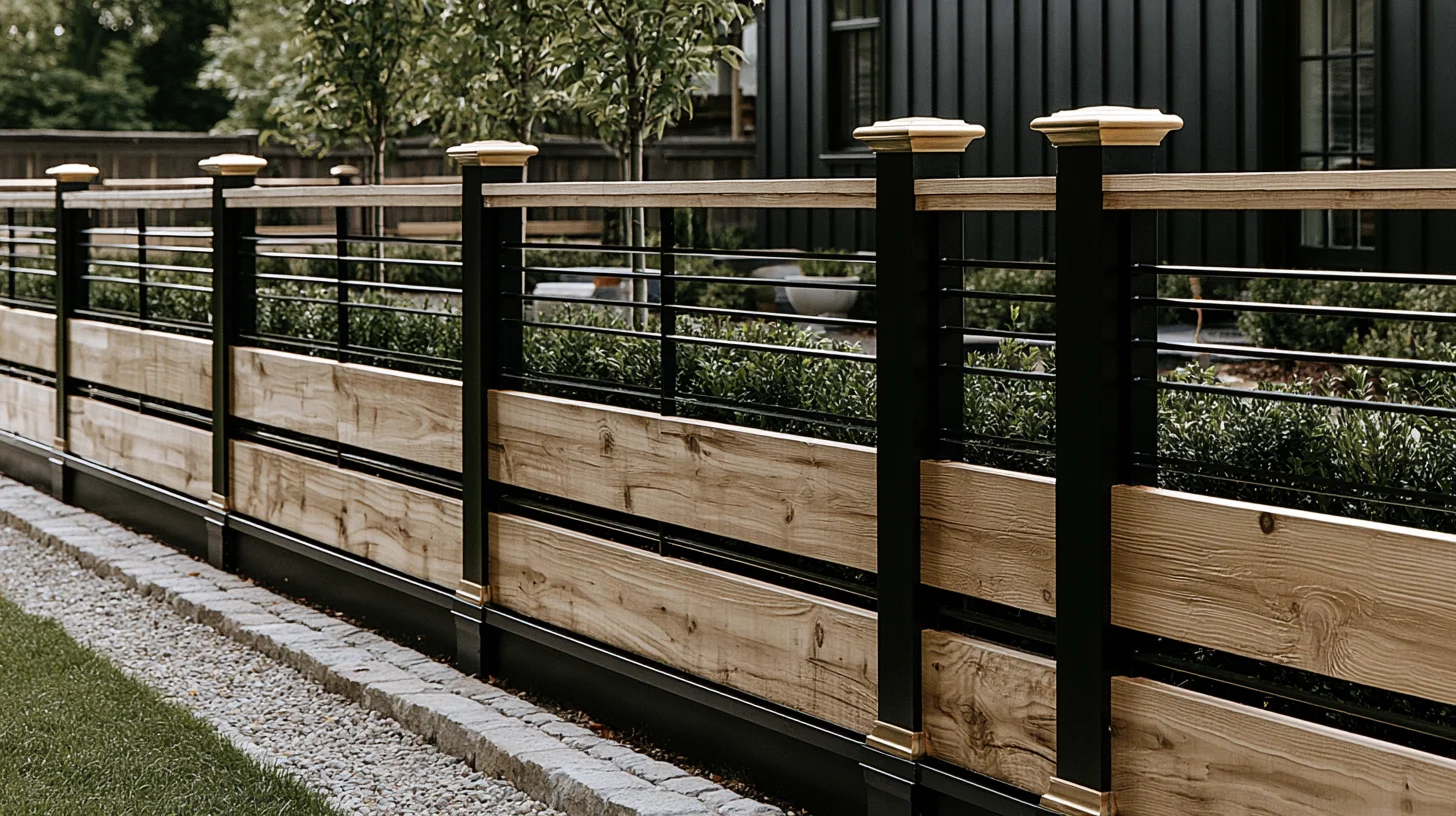
Plan the Fence Line Layout and Estimate Your Materials
Measure the total length of the fence line, then mark corners and gate positions first with stakes and string. Those fixed points anchor everything else. Space line posts 6 to 8 feet apart, and never more than 8, or the fence starts to sag between posts. Tighten the spacing for gates, corners, slopes, high wind, or heavy privacy panels. Walk the full fence line before you commit and note any spot where the ground dips or tree roots sit in the way, since those change where a post can land.
Here's the simple math to order materials
- Posts per straight run: ceil(run length ÷ post spacing) + 1
- Rails: 2 for short fences, 3 for taller privacy fences
- Pickets: total fence inches ÷ actual picket width, then add roughly 10% for waste
Actual picket width matters more than the nominal size, so measure a real board before dividing. Add extra concrete, gravel, and fasteners to your list rather than making a second store run mid-project. A box of exterior screws and a spare bag of nails cost little next to the time a return trip burns. Cost varies a lot by wood, height, and gates, so treat any early estimate as a range (there's a full cost breakdown further down).
How Deep and How Far Apart Should Fence Posts Be?
Fence posts should sit in holes at least 2.5 to 3 feet deep and no more than 8 feet apart. The working rule is to bury about one-third of the post. An 8-foot post typically needs a hole around 2.5 feet deep plus gravel. In cold climates, This Old House notes that a 6-foot fence may need posts set near 36 inches to get below the frost line and reduce frost heave.
Dig each post hole about three times the width of the post, so a 4x4 wants a hole roughly 10 to 12 inches across. A clamshell digger works for a few posts, but rent a powered auger if you have a long fence line to dig. Put 3 to 4 inches of gravel in the bottom of each hole first. That base lets water drain away from the post end instead of pooling and rotting it, which is one of the most common reasons posts fail early. Tamp the gravel down and set the post on top of it so the post base sits above any standing water that collects at the bottom of each hole.
Concrete gives the fence its stability, and it's worth using on gate posts, corners, and end posts especially. Set the post, brace it, and check it with a level so it stays plumb while the concrete sets. Slope the top of the concrete away from the post so water sheds off instead of collecting against the wood. Let it cure 24 to 48 hours before you hang rails. Run a string line between corner posts as you go so every post is properly aligned and the fence reads straight. Take the time to position each post against that string before the concrete firms up, because a post that drifts even half an inch shows in the finished line.
Installing Rails and Fence Slats (Pickets)
Rails (also called stringers) either run level or follow the slope, depending on the design you chose. For fences up to about 4 feet, top and bottom rails are enough. For a 6-foot privacy fence, use three rails, adding a middle one for support so the pickets don't bow over time. A rough rule is one rail per 2 feet of height. Cut the rails to length with a circular saw, checking each measurement against the actual gap between posts rather than assuming every bay is identical.
Predrill the rail ends before fastening them to the posts, which keeps the wood from splitting, and attach with exterior-rated screws. Set the top rail first and level it, then work down, since the top rail sets the visual line the whole fence reads against. Once the rails are up, hang the fence slats using a string line across the top and a spacer block between boards so they stay plumb and evenly spaced. Two screws or nails at each rail hold a picket well; drive them slightly in from the edge so the board doesn't crack. For solid privacy, butt the boards tight; for a shadowbox or spaced look, use a consistent gap to create a clean, repeating rhythm across the run. Double check the spacing every few boards so a small drift doesn't compound across all the pickets.
Leave a gap between the bottom of the pickets and the ground, usually a couple of inches, so the boards don't wick moisture out of the soil and rot from the bottom up. After the remaining slats are in, sand any rough or splintered edges. It's a small step that saves hands later and cleans up the finished line. A tight, even wall of boards is also what delivers the added privacy most homeowners are after.
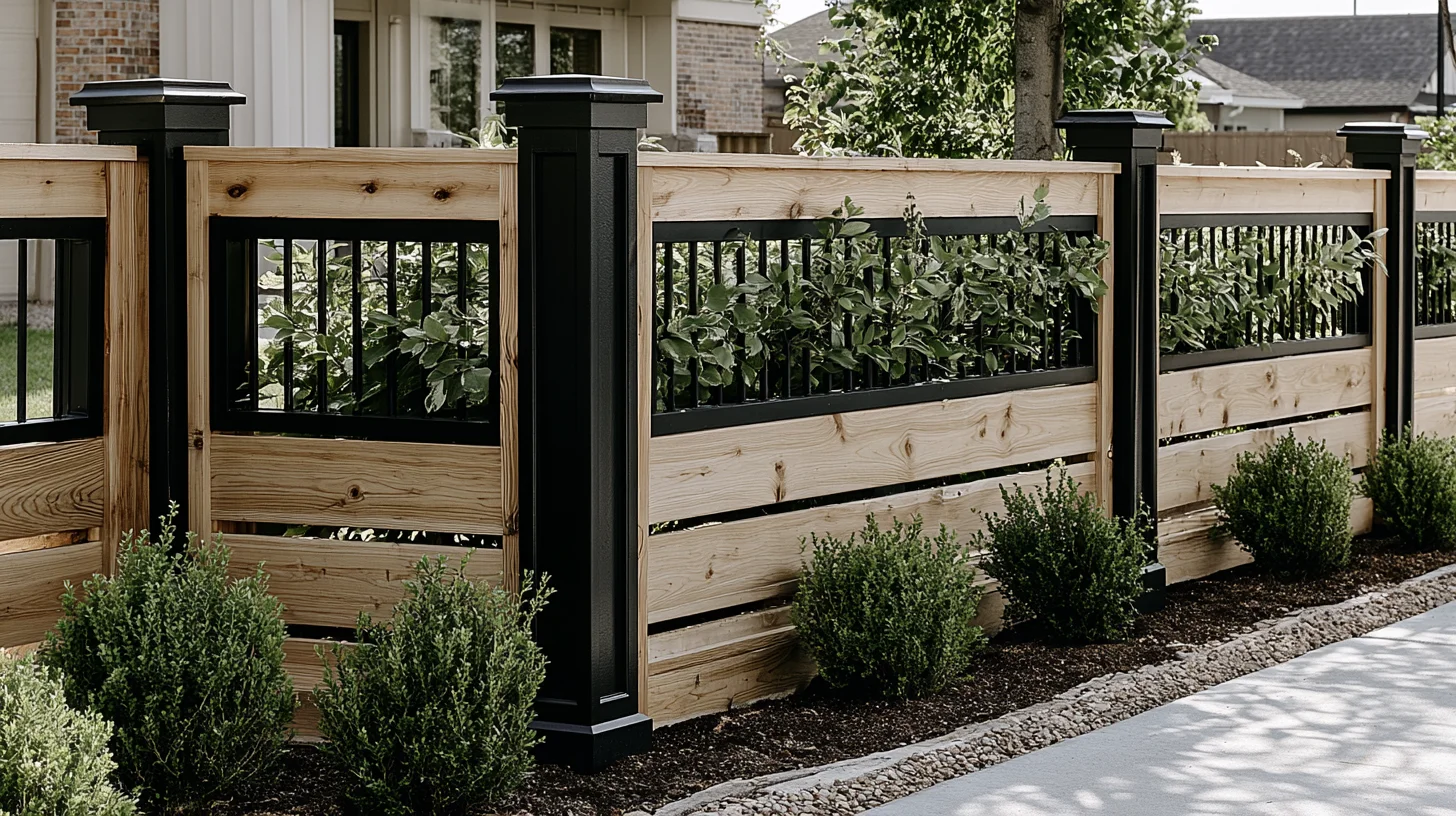
How Do You Build a Wood Fence Gate With Solid Gate Posts That Won't Sag?
Gate posts do more work than line posts because they carry the dynamic load of a gate swinging open and shut, day after day. Set them deeper and in concrete, and use heavier posts if the gate is wide or tall. A sagging gate almost always traces back to a post that wasn't set well enough.
Plan the gate width and hardware before you set those posts, because the hinges, latch, and swing clearance all affect the gap you leave. Build the gate frame with a diagonal brace running from the bottom hinge corner up to the opposite top corner, or use an anti-sag gate kit. That diagonal is what keeps the gate square under its own weight. Attach the hinges to the frame before you hang it, then position the gate in the opening with shims underneath so the bottom clears the ground evenly.
A back yard walk-through gate is DIY-friendly, one of those diy projects that a careful homeowner can finish in a weekend. Automated, security-driven, or commercial gates are a different animal. Companies such as Inline Security Fence show the kinds of access-control, commercial, and security fencing considerations that go well beyond a standard weekend build, from keypad entry to sliding gates and industrial perimeters.
Finishing and Maintaining Your Wood Privacy Fence
If you used pressure treated wood, let it dry out before staining or sealing, since fresh treated lumber holds moisture that repels finish. When it's ready, apply a quality stain, paint, or sealant to protect against UV and moisture, then reapply every few years as the manufacturer directs. Moisture control is the single biggest factor in how long the fence lasts, which is why the USDA Forest Products Laboratory's Wood Handbook treats moisture, biodeterioration, and finishing as the core of wood durability.
Once a year, walk the fence and check the posts, rails, fasteners, and gate hardware. Tighten what's loose, replace rusted screws, and look for soft spots low on the posts. Keep soil, mulch, and irrigation spray away from the wood wherever you can, since constant dampness at the base is what rots posts first. Trim back vines and shrubs that trap moisture against the boards, and rake leaves out of the corner where the fence meets the ground. Metal post guards or concrete blocks at grade can add a layer of protection in wet spots. With that kind of upkeep, a wood privacy fence realistically lasts 20 to 40 years.
How Much Does It Cost to Build a Wood Fence?
Costs move with lumber prices, labor, demolition, gates, slope, soil, and region, so treat any figure as a range. Current 2026 homeowner data puts wood fencing installed at roughly:
- Wood fence, installed: about $10 to $45 per linear foot
- Privacy fence, full project: about $1,800 to $8,000
Height, layout, materials, and the number of gates push you around within those ranges. Doing it yourself saves the labor portion, which is a big share of the total, but you're trading that for tool costs and your own time. Renting an auger, buying a circular saw, and stocking screws and nails all add up if you don't already own them. A mistake that means resetting posts or reordering all the pickets can eat the savings fast, so factor your skill honestly.
When a DIY Fence Isn't the Right Call
Plenty of straight, flat, standard fences are a good weekend job. Others aren't. Get a professional estimate when the fence is tall or code-sensitive, when the lot is steep or rocky, or when utilities, easements, retaining walls, or a pool are in the picture. Large or automated gates, unstable soil, and high wind exposure all raise the stakes too, since these elements complicate an otherwise simple build. Tearing out old posts set in concrete is another job that's rougher than it looks, and hard ground can turn what should be a quick dig into a long afternoon.
For many homeowners, the decision ultimately comes down to how the fence will be used and what the property needs from it. That is reflected in the broader Fencing Market as well, where the Residential segment holds the largest share at approximately 35.1% in 2026, ahead of Agricultural and Industrial applications. With residential fencing accounting for such a significant portion of demand, considerations such as privacy, appearance, DIY installation, maintenance, and backyard gates remain central to the market.
Even if you plan on building a fence yourself, a quote is useful information. A homeowner comparing a DIY build with a professional installation could use a local contractor such as Fantastic Fence as one point of comparison for labor, repair, and gate-related scope before deciding whether the project is worth doing alone. Seeing the priced-out scope often clarifies whether your time and tools actually come out ahead. It's a question that draws plenty of debate and more comments in DIY forums, so weigh your own situation over any blanket rule.
That residential focus is particularly visible in the U.S. Fencing Market, where property security, privacy requirements, curb appeal, and ongoing replacement and maintenance continue to influence purchasing decisions. Homeowners can choose from traditional wood fencing alongside metal, vinyl, composite, and other materials, with the right option often depending on budget, climate, property use, and desired lifespan.
For homeowners who decide that a DIY build is not the right fit, the next step is often choosing the right fencing company and system for the property. This is where established industry names such as Allied Tube & Conduit, Ameristar Fence Products Incorporated, Associated Materials LLC, Bekaert, Betafence NV, CertainTeed Corporation, Gregory Industries, Inc., Jerith Manufacturing Company Inc., Long Fence Company Inc., Ply Gem Holdings Inc., Poly Vinyl Creations Inc., and The American Fence Company come into the picture. Their offerings extend from residential fencing and privacy solutions to the more demanding requirements of agricultural and industrial projects.
Frequently Asked Questions
Is it cheaper to build your own wooden fence?
Usually yes. DIY skips the labor charge, which is often 40 to 60% of the total cost. But you'll need tools, time, and some skill, and a serious mistake like a set of shallow or crooked posts can wipe out the savings.
How do you build a wooden fence step by step?
Check codes and property lines, call 811 to mark utilities, and mark the fence line with stakes and string. Dig holes, set posts in gravel and concrete, then attach the rails, hang all the pickets, install the gate, and seal the wood.
What is the easiest fence to build yourself?
A short picket fence or a pre-built panel fence on flat ground, with few gates and standard post spacing. Flat terrain and simple hardware remove most of the tricky parts.